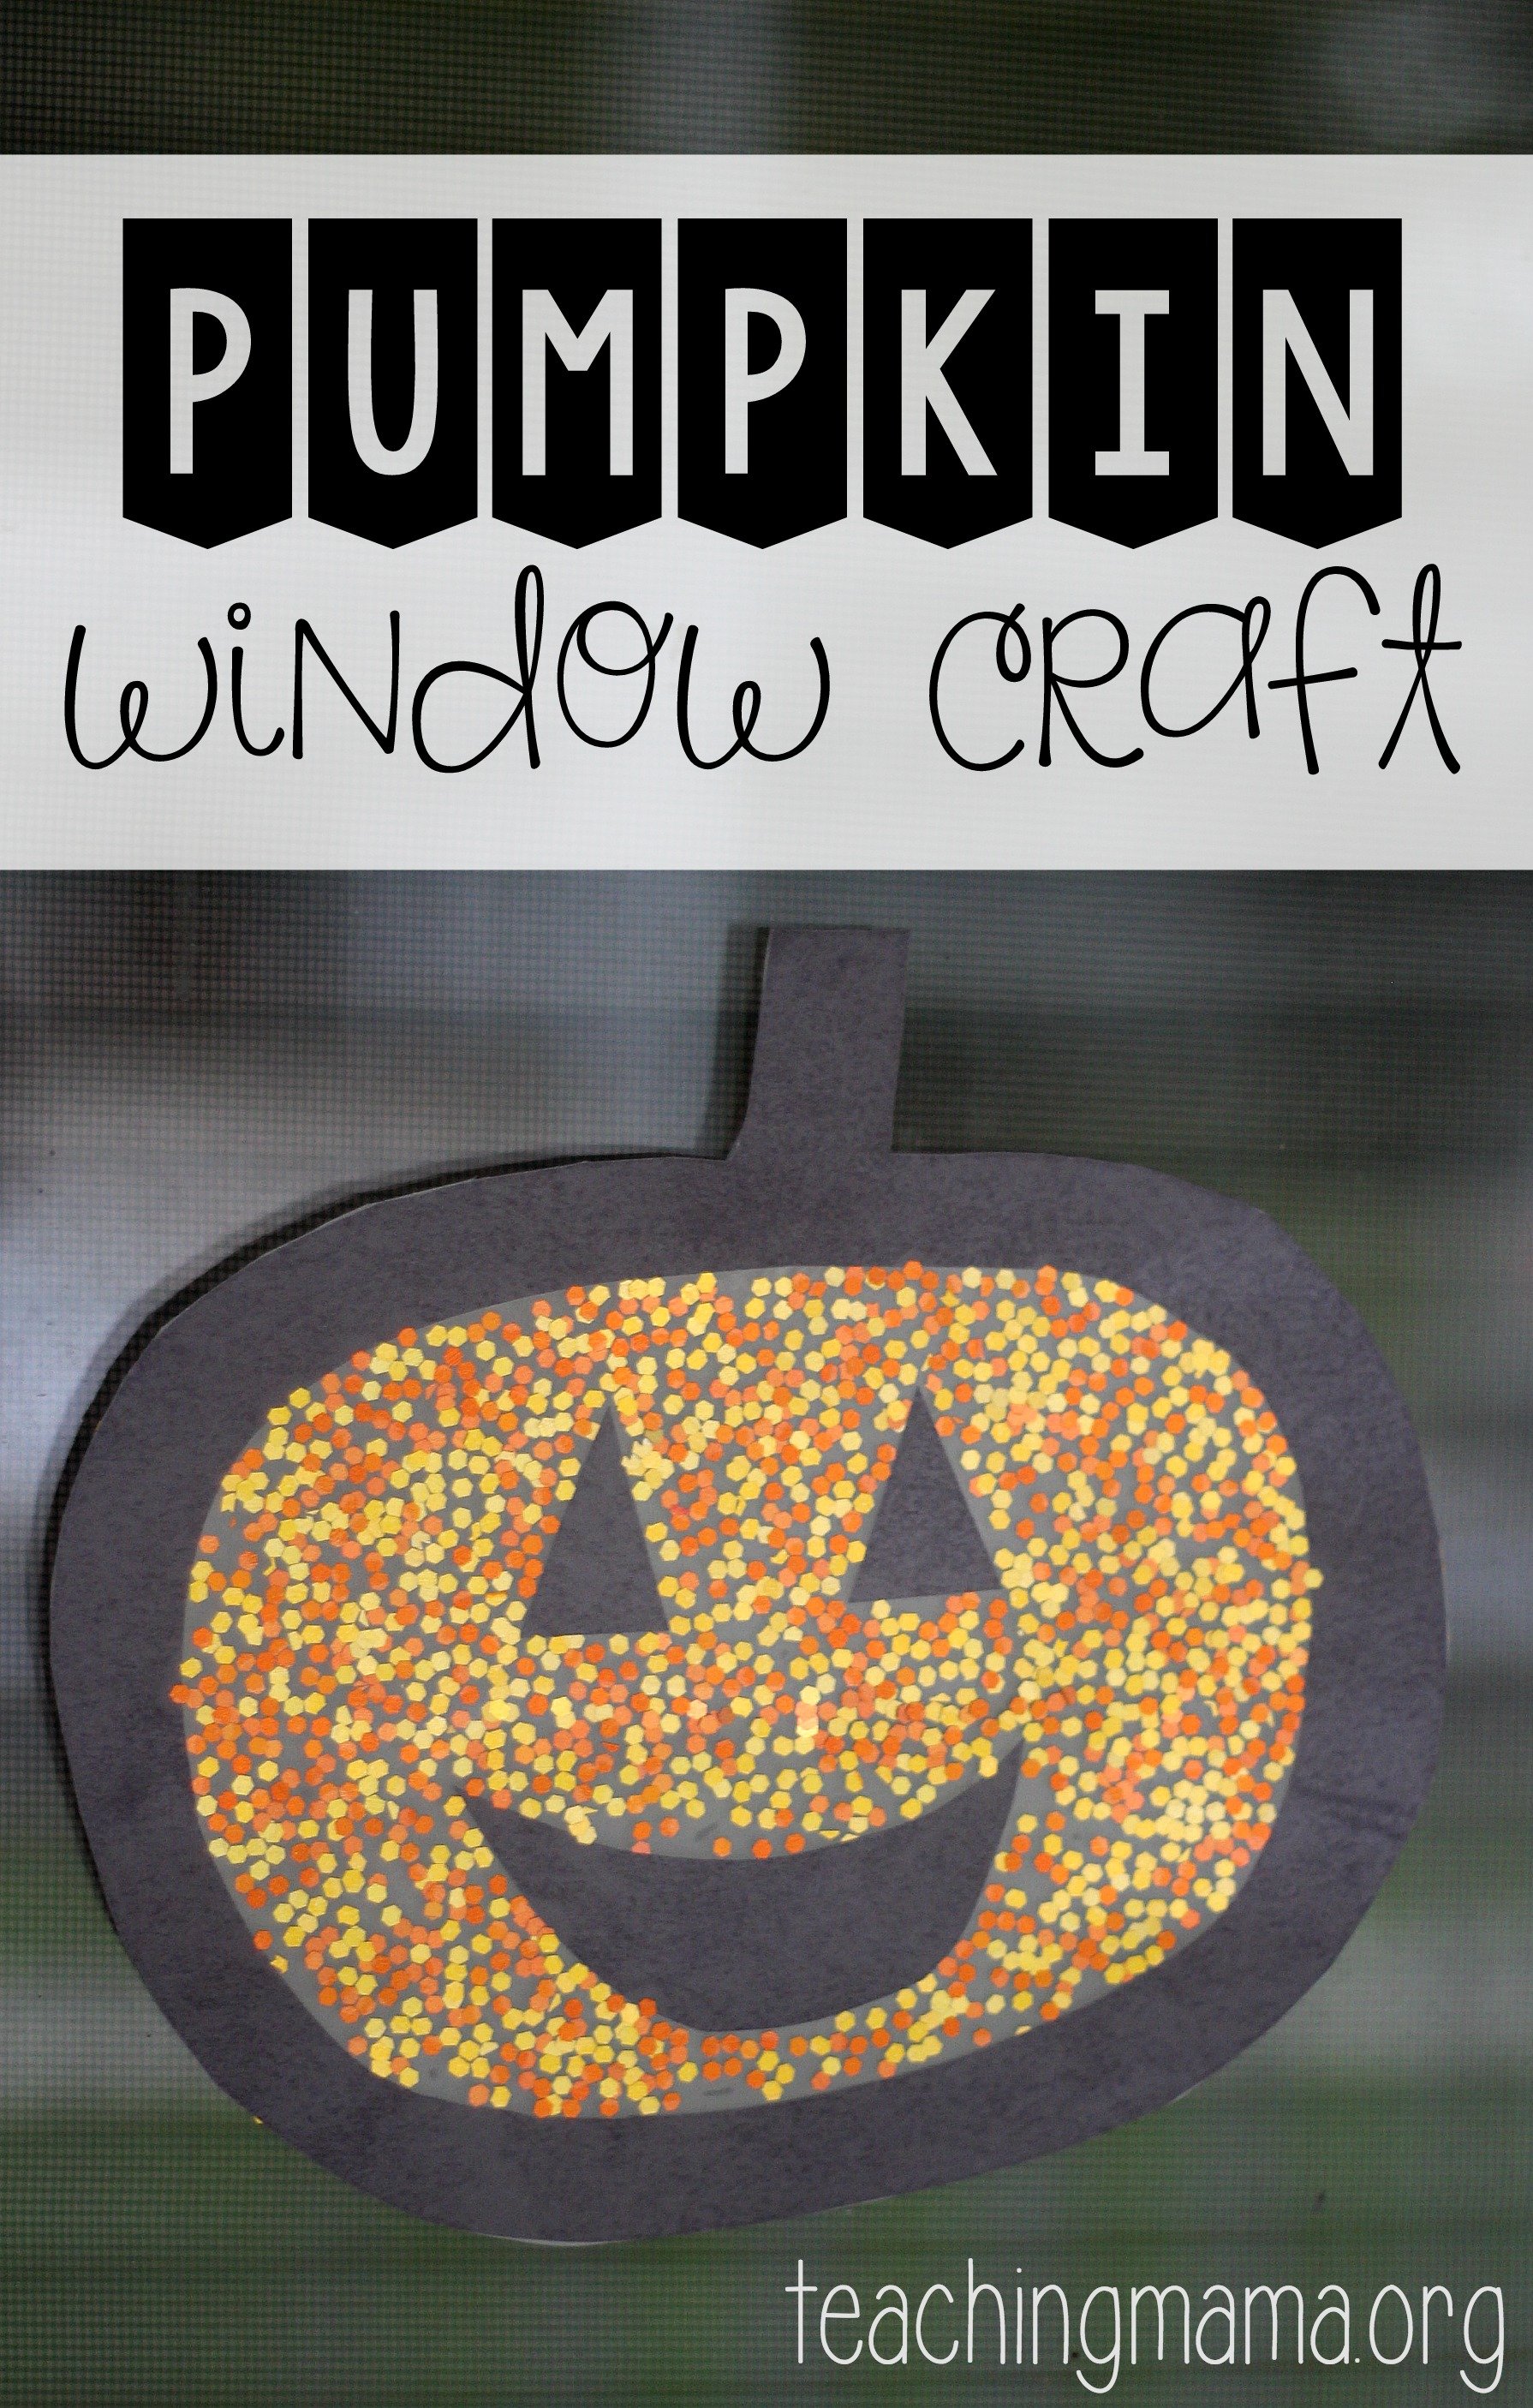
Pumpkin Window Craft
I love pumpkins! They are so cheery and festive for this time of the year. Today I’m sharing with you a fun pumpkin window craft that will look great on your windows! And a bonus is that it’s very easy to make!
This post contains affiliate links. See my disclosure for details.
Here’s what you need for this pumpkin window craft:
- clear Con-Tact paper
- black construction paper
- fall glitter (We used glitter found at Michaels. The link shows similar glitter, just different colors.)
- scissors
To start out, draw a pumpkin outline on a black piece of construction paper with a white crayon.
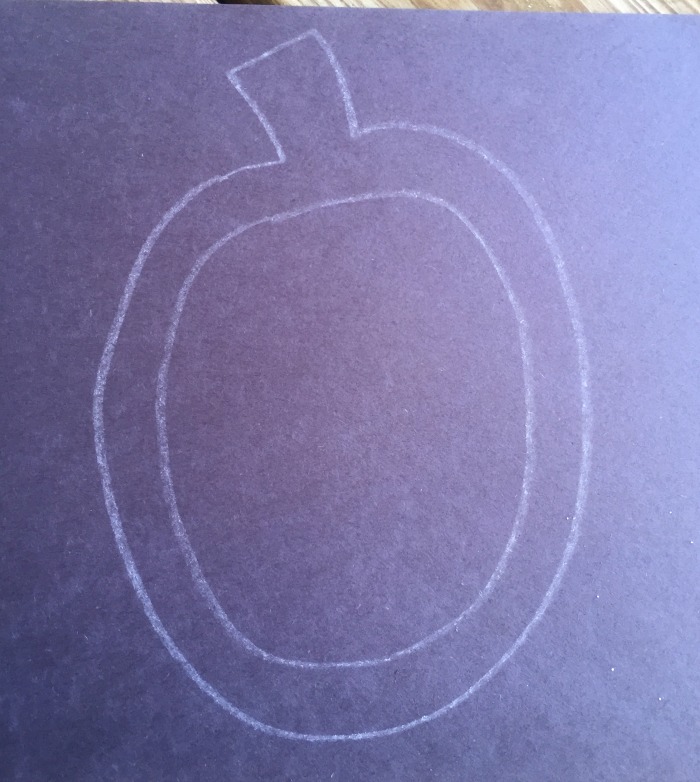
Next, cut it out. Lay the outlined pieces on top of a piece of contact paper. Cut out eyes and a mouth from the black paper and lay it on the contact paper. Then cover the pumpkin with glitter! After the glitter is spread out, add another piece of contact paper on top. Trim around the edges.
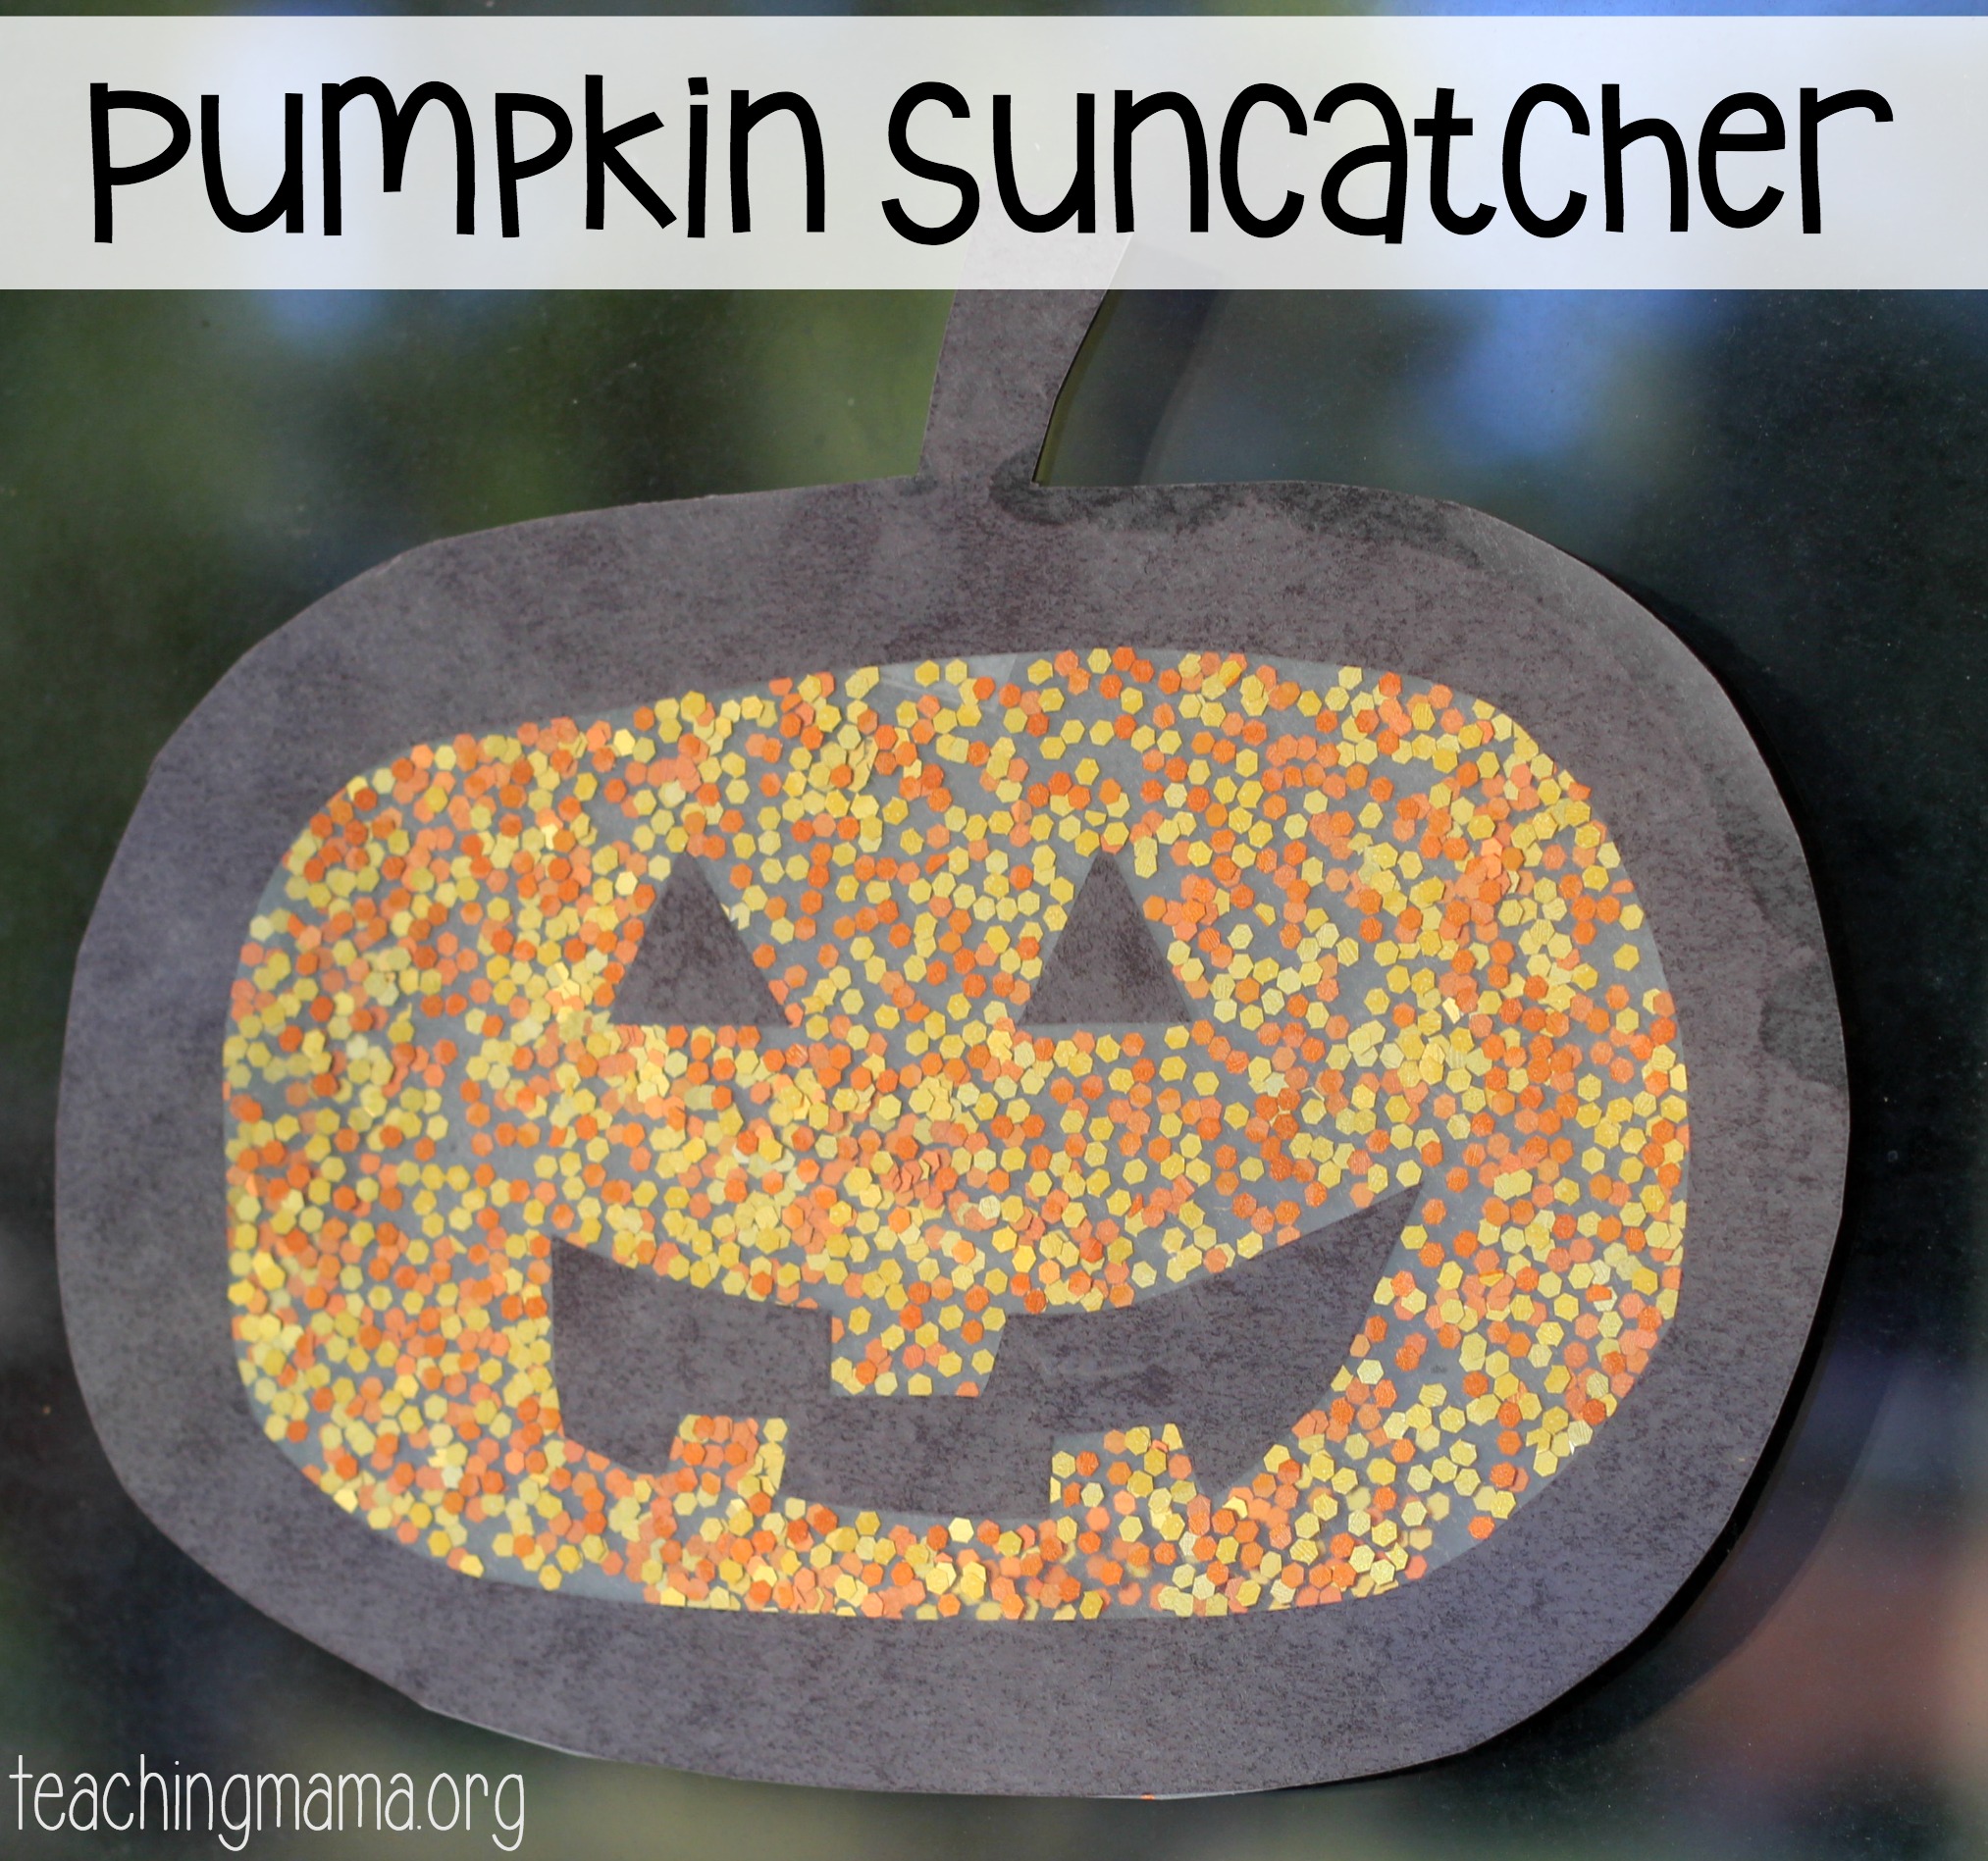
When you’re done, hang it on the window with a small piece of tape. I think they look so happy on the window! When the sun isn’t shining on them, they still look really cool!

This can be done as an activity with children or you can just create them to decorate your classroom or home.

I always love finding ways to dress up the windows for holidays. It just brings more cheer to our home! Also make sure to check out how to make your own window clings! Happy Fall!

So sorry, another question……why are we putting 2 contact pieces on top of one another, this is sooooooo confusing for me, not sure why, I’ve made other crafts suggested by you.
I’m sorry! The 2nd piece of contact paper is to seal the glitter in. Otherwise, the glitter could fall out. 🙂
I’m so confused?? When you say ‘lay the outlined pieces on top of a piece of contact’,
what outlined pieces are you talking about?
I’m so sorry that my instructions aren’t clear enough. I’ll reword things to make it better.
Start with drawing a pumpkin shape on black paper. Then cut it out and lay it on the sticky side of the contact paper. Cut out eyes/mouth/nose for the pumpkin out of black paper and lay it onto the sticky contact paper. Then add the glitter. Lastly, put another piece of contact paper on top (face down so the sticky side is down) to seal everything together.