10 Simple and Fun STEAM Activities
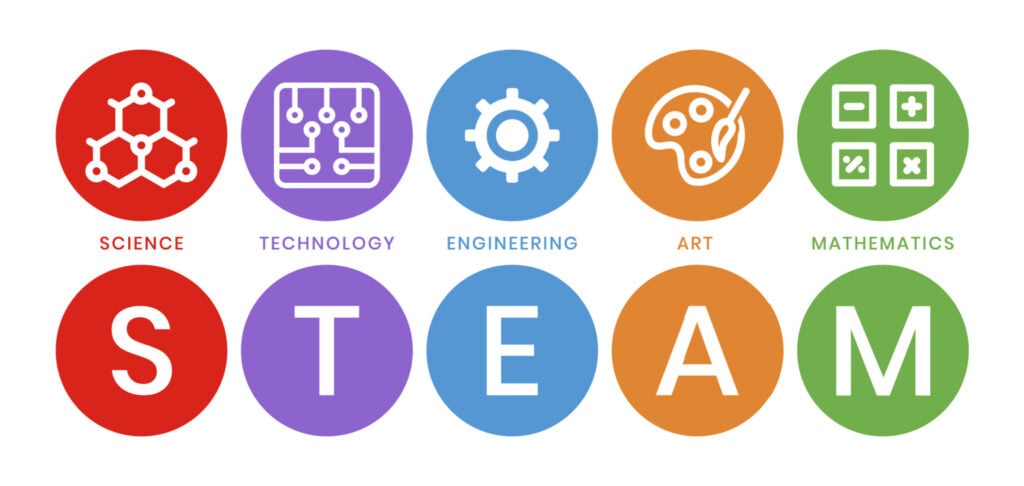
Are you looking for some simple and fun STEAM Activities for kids? In today’s world, the importance of STEAM education cannot be overstated. STEAM stands for Science, Technology, Engineering, Arts, and Mathematics. These subjects are crucial for developing critical thinking skills, problem-solving abilities, and creativity. Not only that, but they also provide a strong foundation for future careers in various fields.
I’ve compiled a list of 10 fun and easy STEAM projects for kids of all ages! We did these projects when my children were preschoolers and they loved these hands-on activities!
These projects are not only educational for the classroom, but also entertaining and interactive. They will keep your kids engaged and curious while they learn. So, let’s dive into the list and get ready to have some fun!
Easy STEAM Activities for Kids
I love that these STEAM activities is they use materials you likely already have at home! Kids of all ages will love these activities, so you can also do these at home with siblings of different ages. I guarantee these activities will spark your child’s curiosity and encourage them to explore these subjects further.
DIY Lava Lamp
Lava lamps are a classic and fun decoration that are loved by both kids and adults alike. Did you know that you can make your own lava lamp at home with just a few materials? It’s so simple and fun!
Materials:
- A clear plastic or glass bottle
- Vegetable oil
- Water
- Food coloring
- Alka-Seltzer tablets
Step-by-step instructions:
- Fill the bottle about a quarter of the way with water.
- Pour vegetable oil on top of the water, filling the bottle almost to the top.
- Add 10-20 drops of food coloring to the oil and water mixture.
- Break an Alka-Seltzer tablet into a few small pieces and drop one piece into the bottle.
- Watch the reaction!

Why does this happen?
The science behind a lava lamp is all about density and solubility. Water is denser than oil, so it sinks to the bottom of the bottle when the two are mixed. The Alka-Seltzer tablet reacts with the water, creating carbon dioxide gas bubbles. These bubbles attach to the blobs of colored water, making them less dense than the oil and causing them to rise to the top. As the bubbles pop, the water blobs sink back down to the bottom, creating the mesmerizing lava lamp effect.
This DIY lava lamp is not only a fun and easy project for kids but also a great opportunity to learn about science concepts like density, solubility, and chemical reactions. See my boys in action making this lava lamp with the video below:
Solar-Powered Oven
Teach your kids that you can cook with the power of the sun! Make this simple solar-powered oven project to demonstrate how.
Materials:
- A large cardboard box
- Aluminum foil
- Plastic wrap
- Black construction paper
- Tape
- Scissors
- Ruler
- Pencil
- Wooden skewers
- Marshmallows
Step-by-step instructions:
- Cut a flap in the top of the cardboard box.
- Cover the flap with aluminum foil, shiny side up, and tape it in place.
- Line the inside of the box with black construction paper.
- Cut a piece of plastic wrap to fit over the opening of the box and tape it in place.
- Prop up the flap using the wooden skewers.
- Place the box in direct sunlight and watch the temperature rise!
- When the temperature inside the box is hot enough, place your marshmallow on a skewer and insert it into the box through the plastic wrap.
- Wait a few minutes for your marshmallow to cook and then enjoy eating it!
Why does this happen?
The sun’s rays contain energy in the form of heat and light. When the rays hit the aluminum foil on the flap of the box, they are reflected and focused inside the box. The black construction paper absorbs the heat, raising the temperature inside the box. The plastic wrap traps the heat inside the box, creating a greenhouse effect. This heat is then used to cook your food.
This solar-powered oven project is not only a fun and easy way to cook but also a great opportunity to learn about renewable energy and the science behind how it works.
Rockets
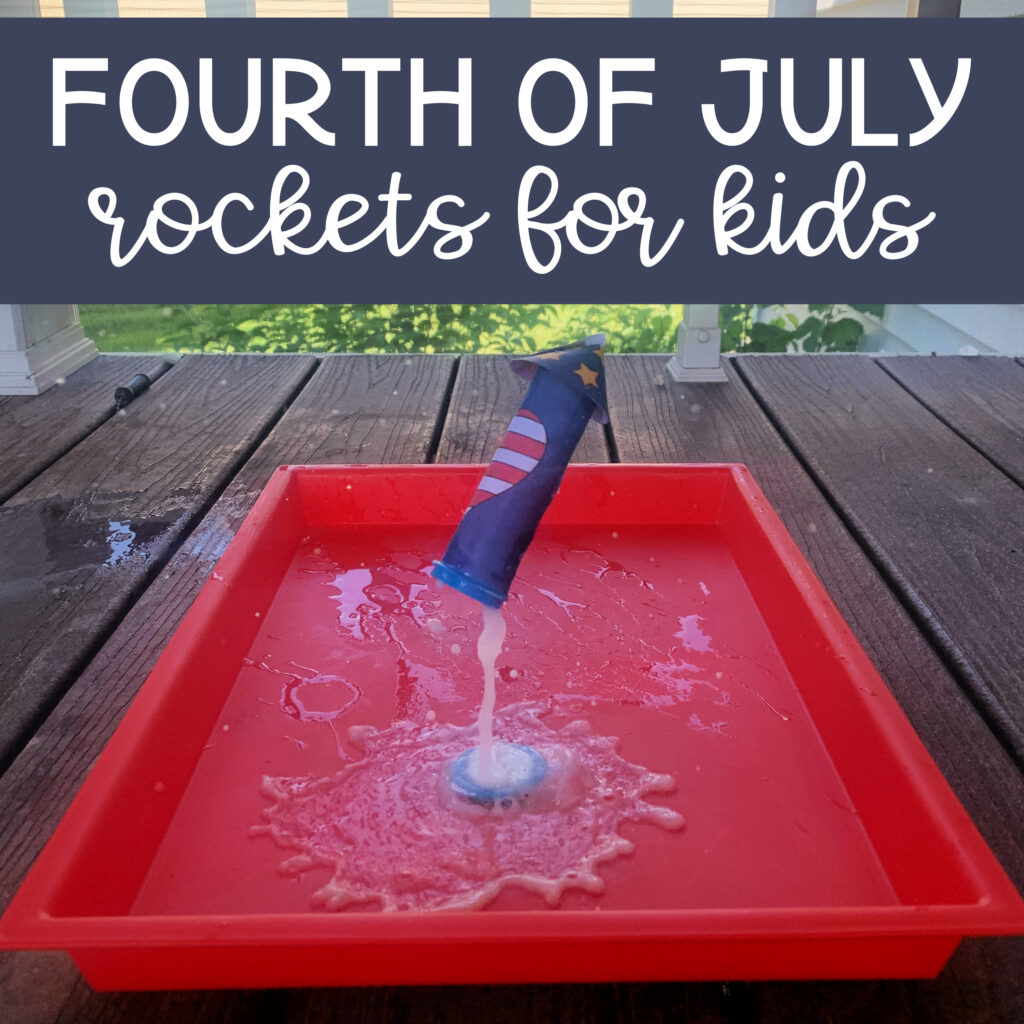
This rocket activity is the perfect way to introduce your kids to the basic principles of aerodynamics and rocket science.
Materials:
- Alka-Seltzer tablets (1 per rocket launch)
- M&M minis tube (1.08 oz tube)
- vinegar
- tape
- scissors
- printable for decorating (optional)
Step-by-step instructions:
- Cut the lid off of the M&M tube.
- If you want to decorate the tube, then cut out the desired decoration from this printable.
- Flip the tube upside down (so the lid would be on the bottom) and wrap the rectangle piece around the tube. Tape it in place.
- Cut out the shape to make the tip of the rocket. Bring the two pieces of the shape together until it makes a cone shape and then tape it together.
- Use a hot glue gun or tape to attach it to the tube rocket.
Launching the Rocket:
I recommend taking the rocket outside and wearing safety goggles to protect your eyes.
- Begin by pouring vinegar inside the tube until it is halfway filled.
- Break and Alka-Seltzer tablet in half.
- Drop it inside the vinegar and quickly attach the lid.
- Flip it so the lid is on the tray or ground.
- Wait a few seconds and then watch the rocket launch! It will be quick!
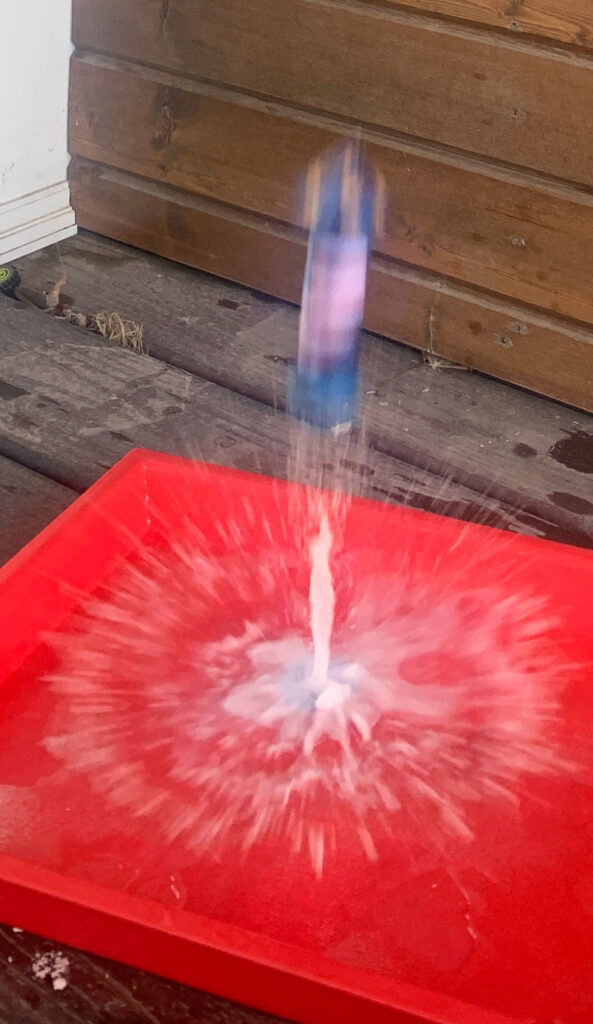
Why does this happen?
When the Alka-Seltzer tablet reacts with the water, carbon dioxide is released, which builds pressure inside of the bottle. Once the pressure is high enough, it blows the canister apart from its lid. That creates a force that propels the rocket upward.
This rocket project is a fun and easy way to teach your kids about the basic principles of physics and rocket science. Plus, they get to create their own rocket and launch it into the air!
Popsicle Stick Catapult
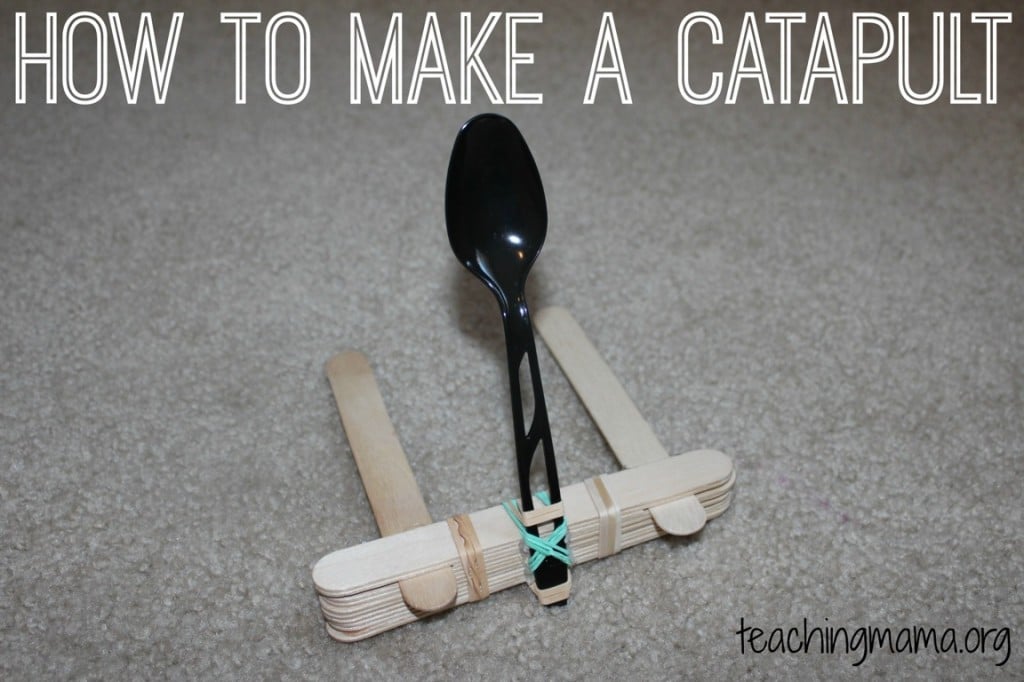
This popsicle stick catapult stem activity is the perfect way to learn about the physics behind catapults and have some fun at the same time! Here’s what you’ll need:
Materials:
- 14 wide popsicle sticks
- 7 rubber bands
- Plastic spoon
- Hot glue gun
- Small objects to launch, such as pom-poms or mini marshmallows
Step-by-step instructions:
- Cut 2 inches off each end of one craft stick with scissors.
- Stack 9 craft sticks. Add the shortened one and then put two more on top.
- Wrap 2 rubber bands around the bundle, about a third of the way in from each end.
- Place a plastic spoon in the center. Wrap a rubber band on each side and crisscross the rubber bands to keep the spoon in place.
- Take another rubber band and loop it on the top and bottom so that they are around the front of the spoon above and below the craft stick bundle.
- Insert two craft sticks into the space created by the shortened craft stick.
- Load your small object into the spoon.
- Pull the spoon back and release it to launch your object!
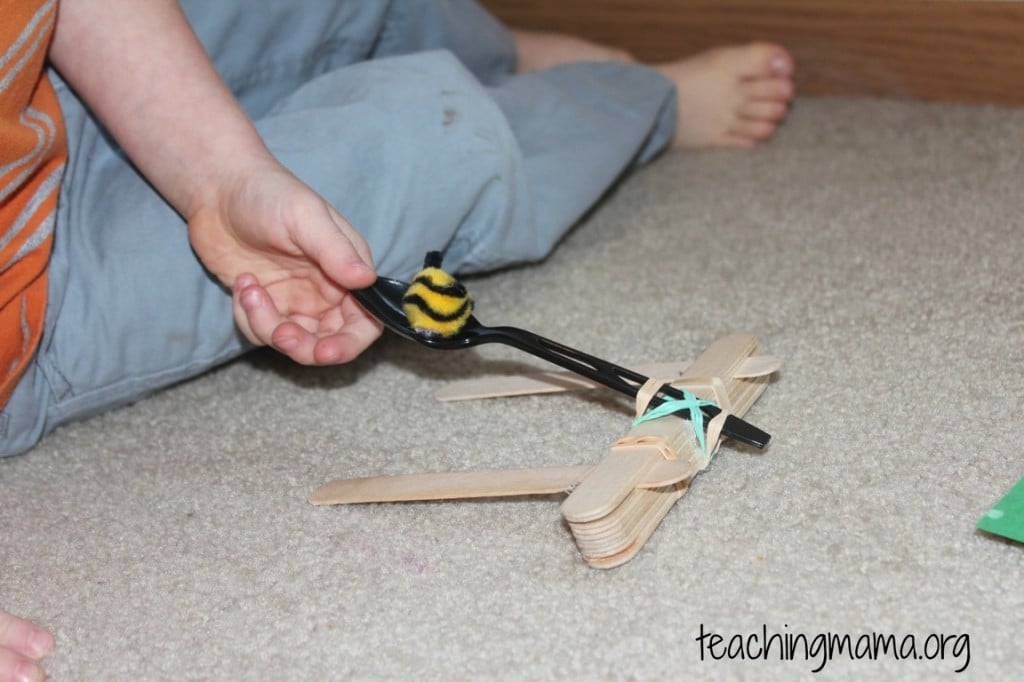
Why does this happen?
Catapults work by using stored potential energy in a flexible material, like the rubber bands in this project, to create kinetic energy that propels the object forward. When you pull the spoon back, you are stretching the rubber bands and storing potential energy. When you release the spoon, the rubber bands snap back into place, releasing the potential energy and creating kinetic energy that launches the object forward.
This popsicle stick catapult project is a fun and interactive way to teach your kids about the physics behind catapults and how they work. Plus, they get to launch small objects into the air and have a blast doing it! I know my boys love doing that!
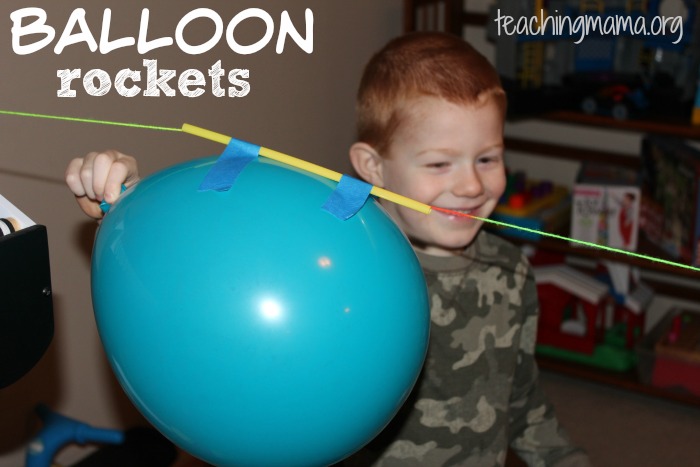
Balloon Rockets
Ready to race into the world of physics? This balloon-powered car project is the perfect way to introduce your kids to the principles of kinetic and potential energy and have some fun at the same time! Here’s what you’ll need:
Materials:
- string
- balloon
- straw
- tape
- something to tie string to
Step-by-step instructions:
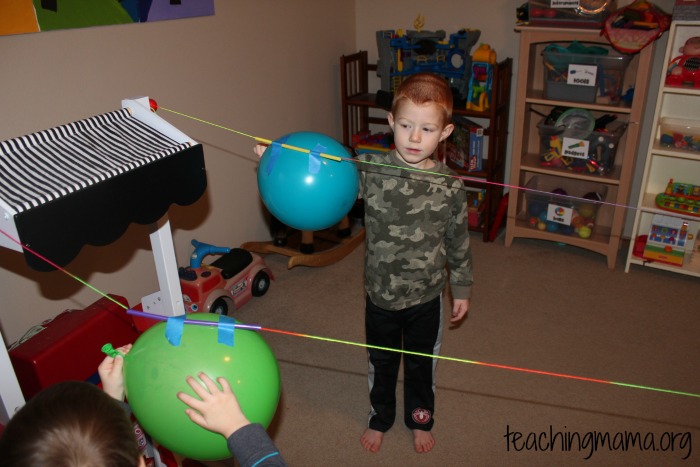
- Tie a piece of string to a sturdy object.
- Stretch out the string and find another object to tie the end to. Before tying it, slip a straw through the string.
- Place two pieces of tape onto the straw so it will fasten onto a blown up balloon.
- Blow up a balloon and pinch the top so air won’t escape.
- When you are ready, let go of the balloon and watch it fly down the string! It will go very fast!
Why does this happen?
When you inflate the balloon, you are filling it with potential energy. When you let go of the balloon, the potential energy is converted into kinetic energy, which propels it forward. As the air rushes out of the balloon, it creates a force that pushes it in the opposite direction, in accordance with Newton’s Third Law of Motion.
This balloon rocket project is a fun and easy way to teach your kids about the principles of kinetic and potential energy and the laws of motion. You could also set this up as a race against another person!
DIY Slime
Looking for a fun and squishy project to do with your kids? This DIY slime recipe is the perfect way to introduce them to basic chemistry principles while having a blast! Here’s what you’ll need:
Materials:
- 1 bottle of white school glue (4-6 oz)
- 1/2 teaspoon baking soda
- 1 tablespoon contact lens solution
- Optional: Food coloring or glitter
Step-by-step instructions:
- Pour the entire bottle of white glue into a bowl.
- Add 1/2 teaspoon of baking soda and mix well.
- Add a few drops of food coloring (optional) and mix until the color is evenly distributed.
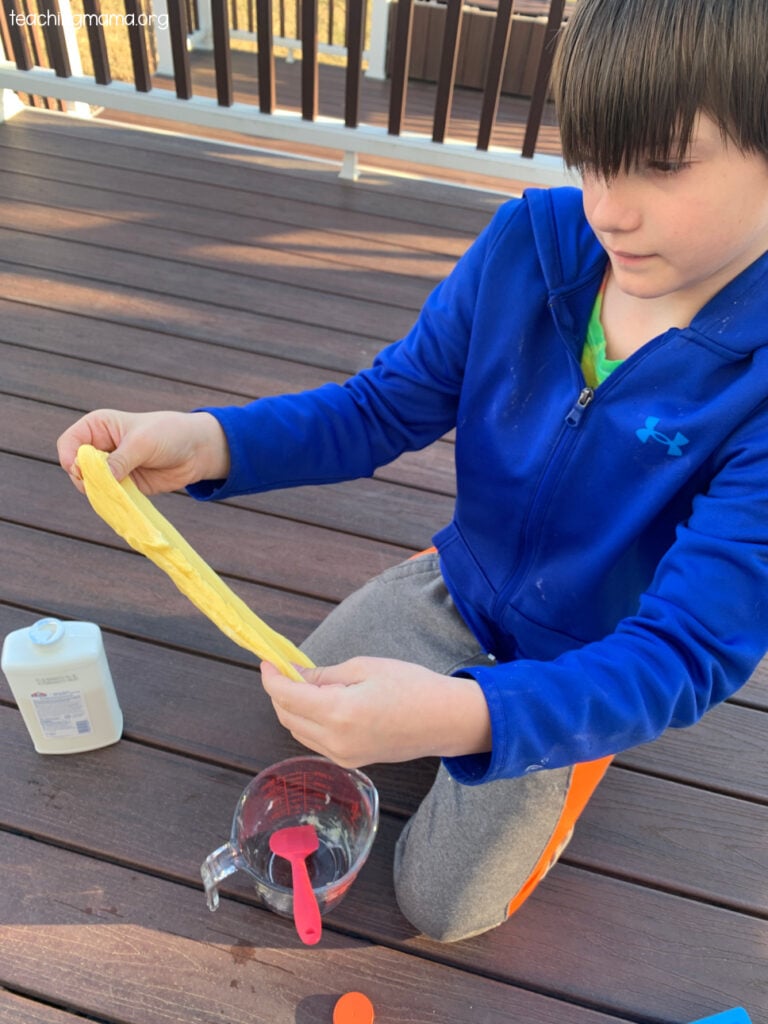
- Add 1 tablespoon of contact lens solution and mix until the slime starts to form.
- Knead the slime with your hands until it reaches the desired consistency.
Why does this happen?
Slime is made through a process called polymerization, where small molecules called monomers combine to form long chains of molecules called polymers. In this case, the glue acts as the monomer and the contact lens solution acts as the cross-linker, linking the glue molecules together to form a polymer. The addition of baking soda helps to create a chemical reaction that strengthens the bonds between the molecules, making the slime stretchy and pliable. Food coloring can be added for a fun, colorful touch!
This slime project is a fun and hands-on way to teach your kids about basic chemistry principles and the process of polymerization. Plus, they get to play with a squishy, stretchy material that they made themselves!
Paper Airplane Challenge
Get ready to soar into the world of physics with this fun and easy paper airplane challenge! Here’s what you’ll need:
Materials:
- Sheets of paper (8.5 x 11 inches)
- Scissors (optional)
- Markers or colored pencils (optional)
Step-by-step instructions for folding different paper airplane designs:
Basic Dart:
- Fold a sheet of paper in half lengthwise.
- Unfold the paper and fold the top corners down to the center crease.
- Fold the top edges down to the center crease again.
- Fold the paper in half along the center crease and make wing creases.
- Open up the wings and make small folds to create wing flaps.
Check out this video for more detailed instructions.
Glider:
- Fold a sheet of paper in half lengthwise.
- Fold the top corners down to the center crease.
- Fold the top edges down to the center crease again.
- Fold the wings down along the bottom edge of the paper.
- Fold up the back of the wings to create wing flaps.
Check out the following video for more details:
Explanation of the physics behind flight:
Paper airplanes work based on the principles of aerodynamics, which is the study of how air moves around objects. The design of the plane affects its ability to fly through the air. The wings of a paper airplane are designed to create lift, which is the force that allows the plane to stay in the air. The shape and size of the wings affect how much lift is created. The weight of the plane and the force of gravity also play a role in how the plane flies. The shape of the plane can also affect its stability and how well it can turn and maneuver in the air.
This paper airplane challenge is a fun and interactive way to teach your kids about the principles of aerodynamics and the physics of flight. Plus, they get to experiment with different designs and see how they affect the plane’s flight!
Circuit Maze
Get ready to become an electrical engineer with this fun and challenging circuit maze project! Here’s what you’ll need:
Materials:
- Circuit maze board (Our favorite circuit board is this one.)
- Batteries (AA or AAA)
- Wires (included in circuit maze kit)
- Various circuit components (included in circuit maze kit)
Step-by-step instructions:
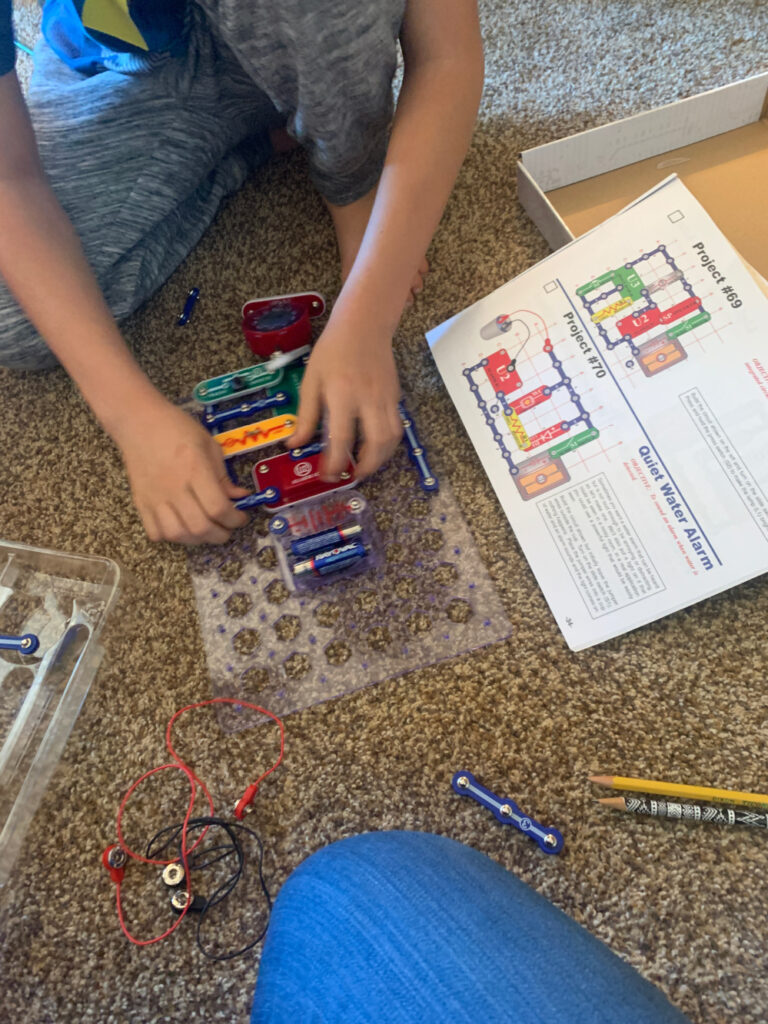
- Set up the circuit maze board according to the instructions provided.
- Connect the battery to the circuit maze board using the wires provided.
- Start at the beginning of the maze and use the circuit components to create a complete circuit that will light up the LED at the end of the maze.
- Experiment with different circuit components to create different paths through the maze.
How does this work?
A circuit is a closed loop that allows electrical current to flow. Electrical current is the movement of electrons through a conductor, such as a wire. A circuit requires a power source, such as a battery, and a load, such as an LED, that uses the electrical current. Circuit components, such as switches and resistors, can be used to control the flow of electrical current in a circuit. In the circuit maze project, the wires and circuit components are used to create a complete circuit that will allow electrical current to flow from the battery to the LED.
This circuit maze project is a fun and interactive way to teach your kids about basic circuits and electrical current. They’ll get to experiment with different circuit components and see how they affect the flow of electrical current through the circuit. Plus, they’ll develop problem-solving skills as they work their way through the maze!
Magic Milk Experiment
Get ready for a colorful and mesmerizing experiment with this rainbow milk project! Here’s what you’ll need:
Materials:
- Milk (whole or 2%)
- Food coloring (assorted colors)
- Dish soap
- Q-tips
- Plate or shallow dish
Step-by-step instructions:
- Pour a small amount of milk onto the plate or shallow dish.
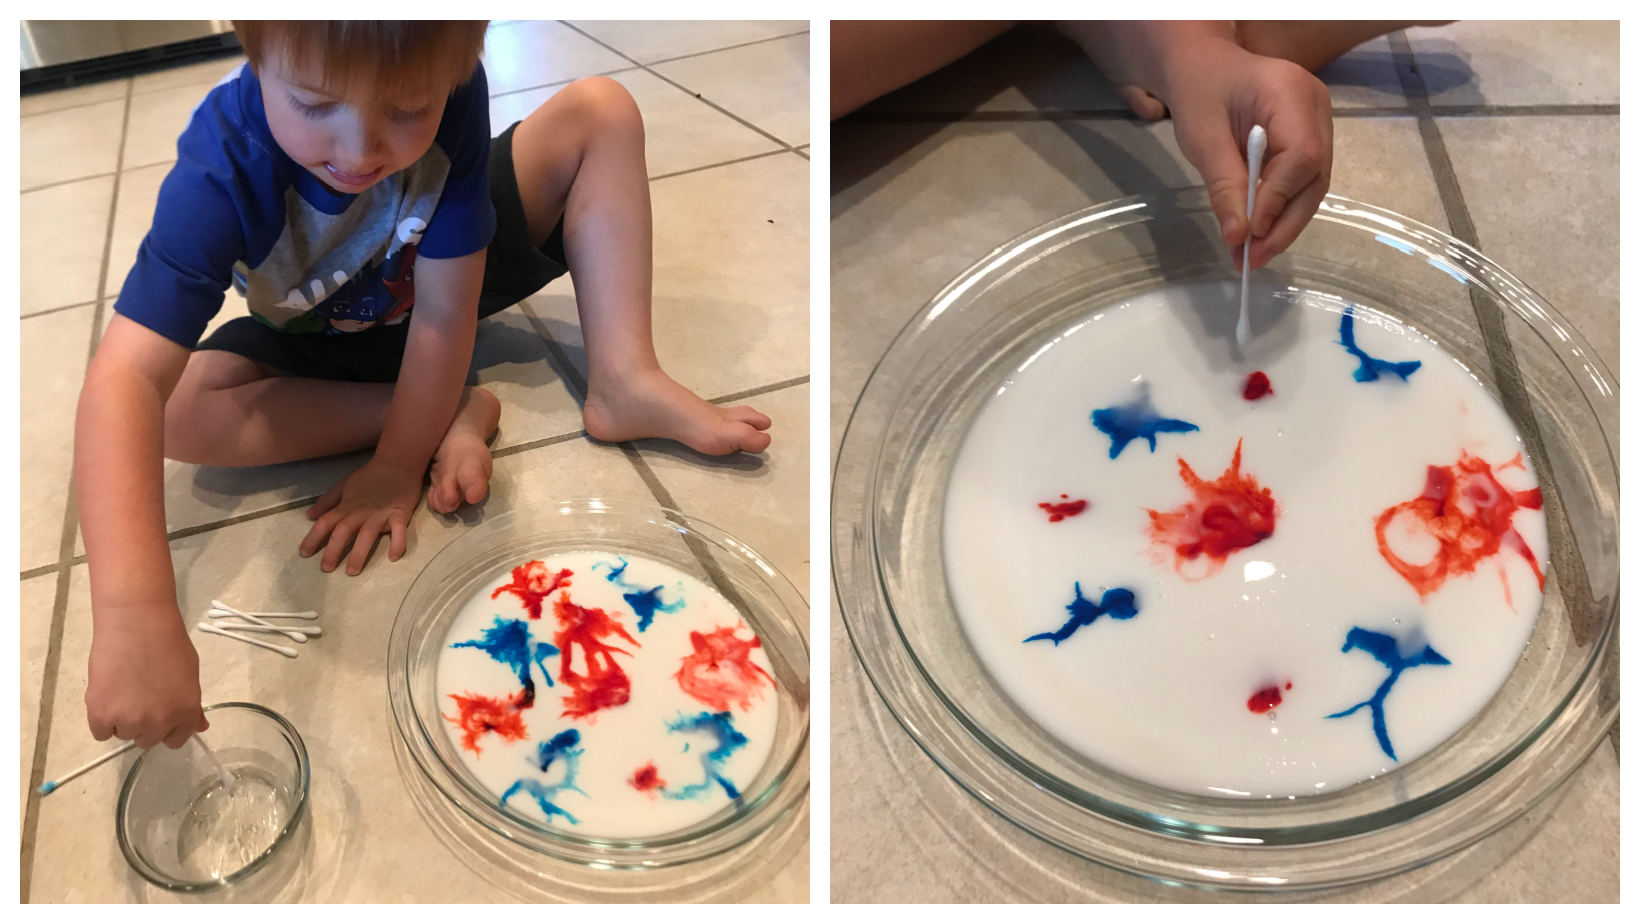
- Add drops of food coloring to the milk in a circular pattern, using different colors.
- Dip one end of a Q-tip in dish soap.
- Touch the Q-tip to the center of the milk and watch the colors spread and swirl.
- Dip the Q-tip in the soap again and touch it to other areas of the milk to create more swirling patterns.
How does this work?
The food coloring in the milk is less dense than the milk itself, so it sits on top of the milk. When the dish soap is added to the milk, it breaks the surface tension of the milk and causes the molecules to move apart. This creates a chemical reaction that causes the food coloring to spread and mix together in a beautiful, swirling pattern. The dish soap molecules bond with the fat molecules in the milk, causing the food coloring to move and mix with the milk. The swirling patterns will continue until the dish soap is completely mixed with the milk.
This rainbow milk experiment is a fun and engaging way to teach your kids about chemical reactions and surface tension. They’ll love watching the colors mix and swirl, and they’ll learn about the science behind the process.
Egg Drop Challenge
Get ready for an exciting and challenging physics experiment with the egg drop challenge! Here’s what you’ll need:
Materials:
- Raw eggs
- Various materials for building the egg container (paper cups, straws, popsicle sticks, tape, rubber bands, balloons, etc.)
- Scissors (if needed)
Step-by-step instructions:
- Start by designing and building an egg container using the materials provided. Be creative and try different designs to see what works best.
- Carefully place a raw egg inside the egg container and secure it in place.
- Choose a high point to drop the egg container from, such as a balcony or ladder.
- Drop the egg container and see if the egg survives the fall.
- If the egg breaks, try modifying the egg container and dropping it again.
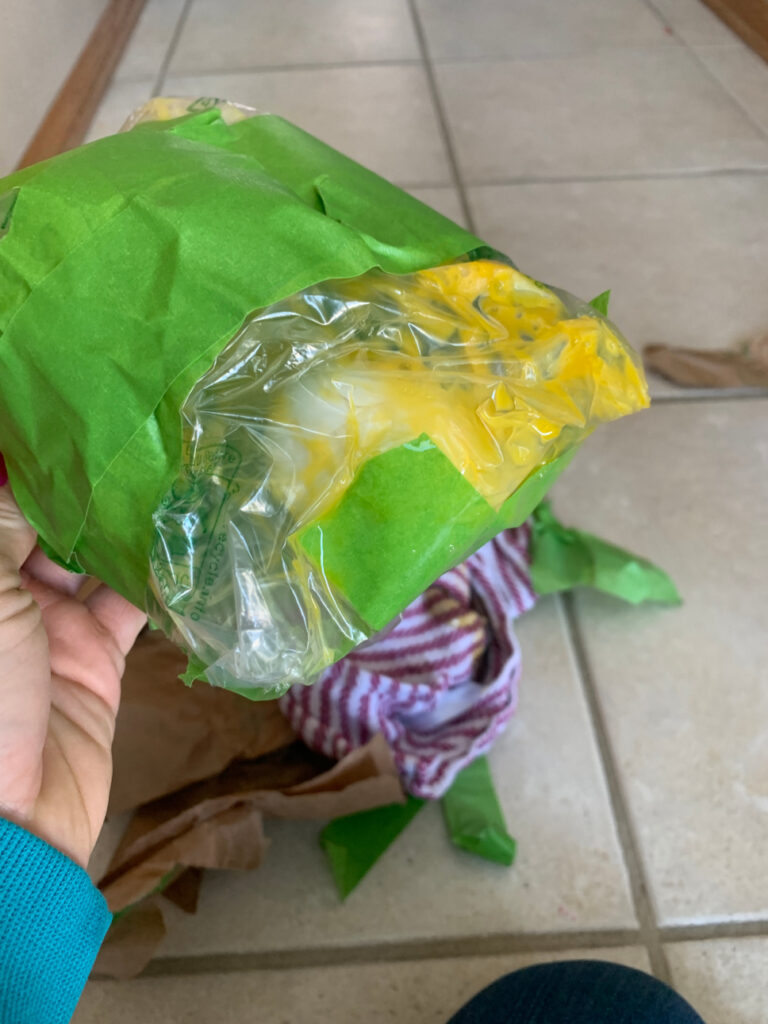
Here’s a picture of one of our designs that didn’t work!
How does this work?
The egg drop challenge is a great way to teach kids about physics and the laws of motion. When an egg is dropped from a height, it gains potential energy due to its position above the ground. As it falls, this potential energy is converted into kinetic energy, or energy in motion. When the egg hits the ground, the kinetic energy is transferred to the ground, causing the egg to break.
The challenge is to design an egg container that will protect the egg from breaking when it hits the ground. This involves understanding concepts such as force, momentum, and energy.
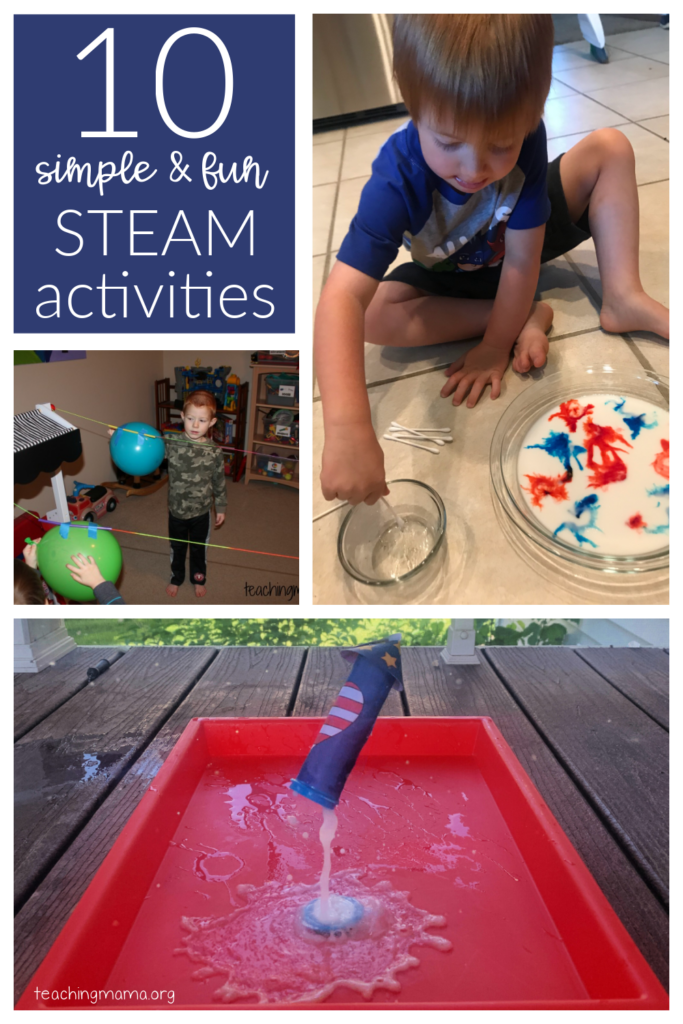
These 10 fun and easy STEAM projects are a great way to engage kids of all ages in science, technology, engineering, art, and math. By doing these projects, kids can learn about scientific concepts and develop important skills such as problem-solving, critical thinking, and creativity.
So, whether you’re a parent, teacher, or just looking for a fun way to spend an afternoon, these projects are perfect for you! Give them a try and see how much fun and learning you can have.

