Teaching Mama

playing, creating, and learning at home

Success! Now check your email to confirm your subscription.

There was an error submitting your subscription. Please try again.

facebook twitter pinterest instagram googleplus email bloglovin
  • Home
  • About
    • Disclosure
    • Privacy Policy
    • Meet the Team
  • Baby
  • Toddlers
    • Sensory Play
    • Fine Motor Skills
    • Gross Motor Skills
    • Toys
  • Preschoolers
    • Homeschooling
    • Alphabet
      • Printable Alphabet Packets
    • Fine Motor Skills
    • Gross Motor Skills
    • Math
    • Music
    • Reading
      • Book Activities
    • Science
    • Technology
  • Motherhood
    • Thoughts on Life
    • Faith
    • Parenting
  • Contact
  • My Store
    • Your Account
    • Cart
    • Checkout
  • Course

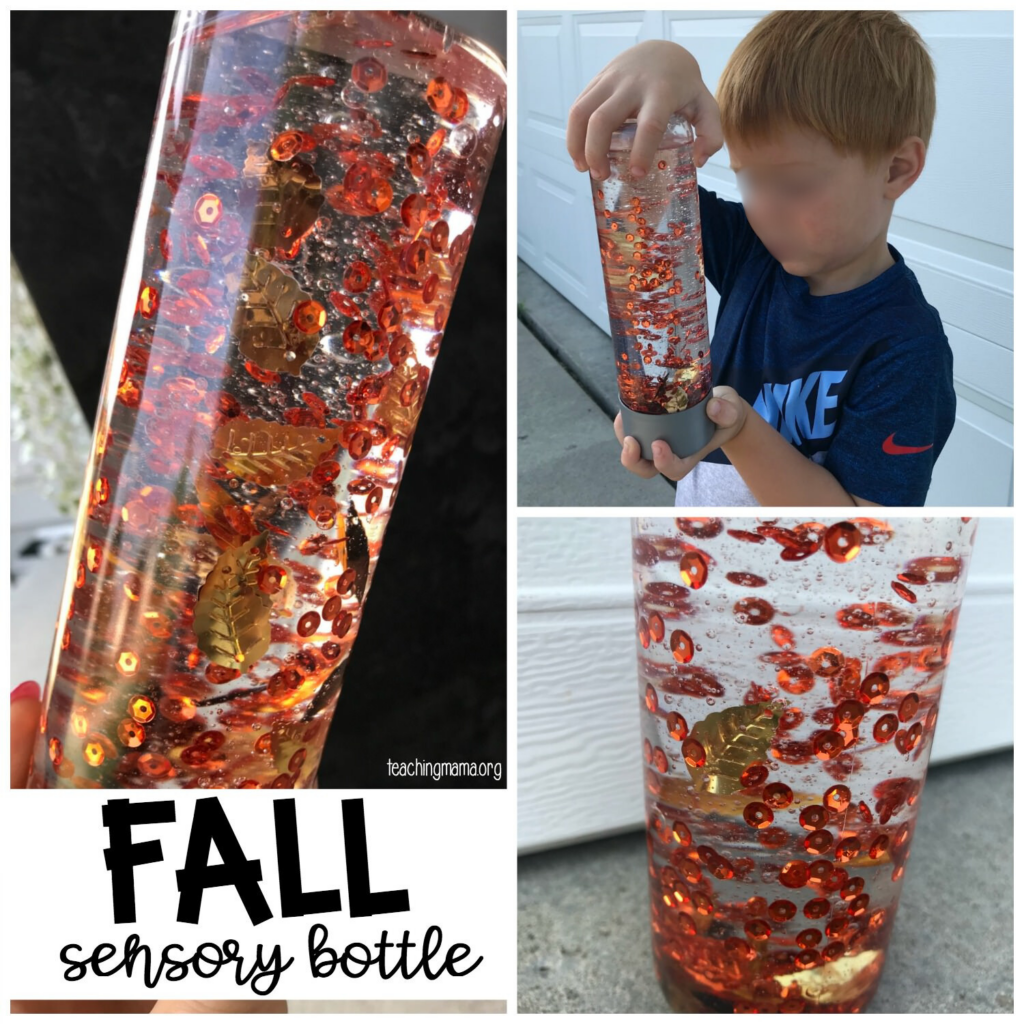
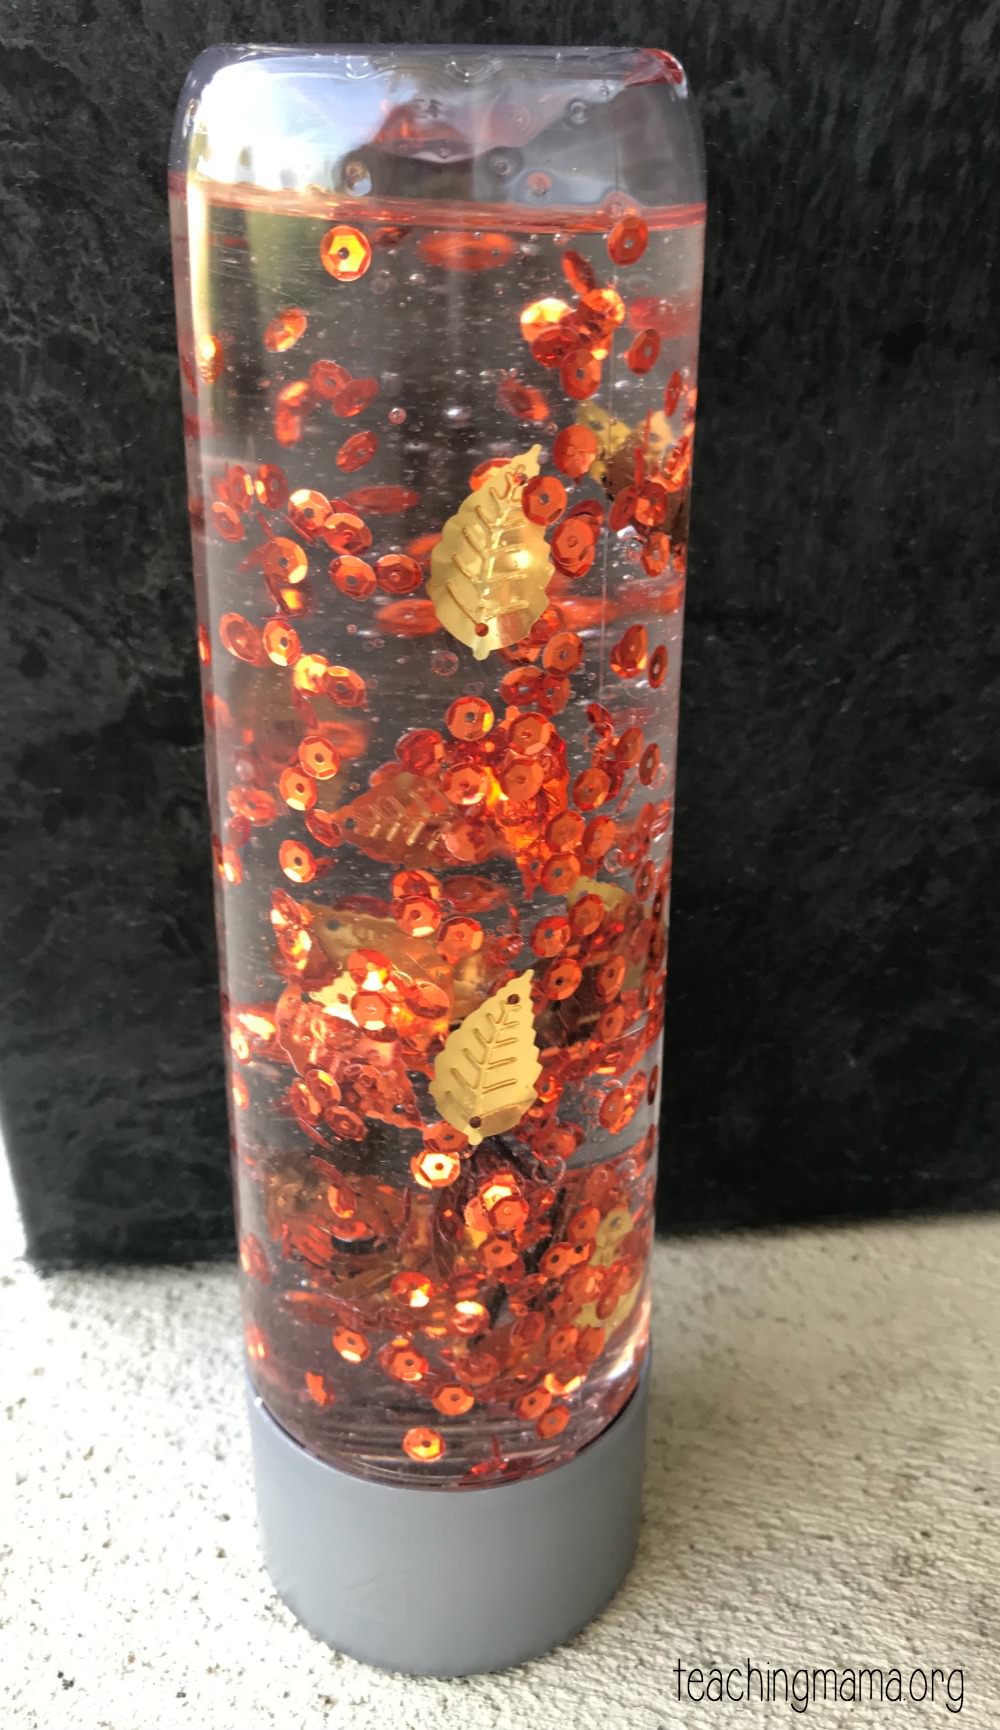
Sensory Bottle with Confetti Leaves

by Angela Thayer 5 Comments

Fall is almost here! I love to make sensory bottles and I realized I’ve made a new fall sensory bottle every year. This time I”m making a sensory bottle with confetti leaves. It’s so pretty and pictures don’t do it justice!

Disclosure: This post contains affiliate links to Amazon.

Here’s what I used for this fall sensory bottle:

  • 16 ounces of mineral oil (you can also find it at the dollar store!)
  • handful of confetti (orange circles and leaves – this is a similar one)
  • plastic VOSS water bottle
  • glue on the lid

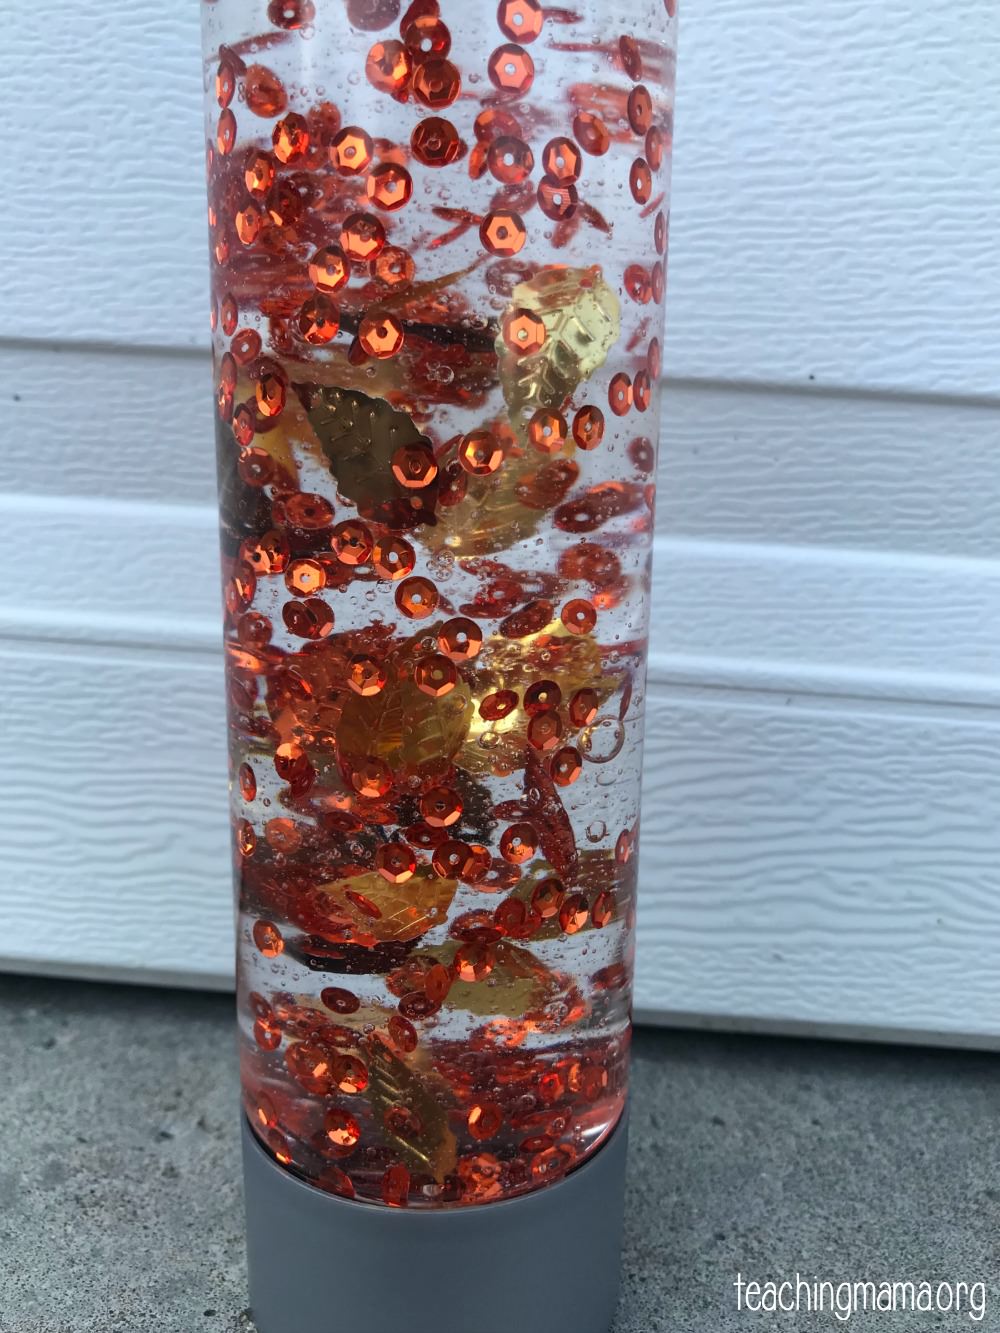
To make it, I filled the empty water bottle with mineral oil. Then we poured in the confetti. We glued the lid on by placing hot glue around the rim and then screwed the lid on.

Then we shook the bottle back and forth and watch the confetti swirl around. The mineral oil makes the confetti move around the bottle more slowly. We’ve used water and confetti before, but it makes it move really quickly.

It’s really mesmerizing to look at the bottle.

Sensory bottles are great for calming a child down, visual tracking, and language skills as they use words to describe what they see. I love this article from my friend about why sensory bottles, bins, and bags are important.

If you want to see more of our sensory bottles, just click here.

Related Posts

  • Fall Sensory BottleFall Sensory Bottle
  • Glow In the Dark Sensory BottleGlow In the Dark Sensory Bottle
  • Glow Sticks Sensory BottleGlow Sticks Sensory Bottle
  • Fall Sunset Sensory BottleFall Sunset Sensory Bottle
  • Valentine’s Themed Sensory BottleValentine’s Themed Sensory Bottle
  • Crayon Sensory BottleCrayon Sensory Bottle

Sharing is caring!

1018shares
  • Facebook 2
  • Twitter

Filed Under: Fall Activities, Sensory Play Tagged With: fall activities, sensory bottle

Comments

  1. Kristie Patton says
    September 5, 2018 at 9:27 am

    have you used baby oil for the liquid in a sensory bottle? Would that work?
    thanks

    Reply
    • Angela Thayer says
      September 6, 2018 at 8:40 pm

      Yep! That would work, too.

      Reply
  2. Mrs.D says
    September 7, 2018 at 4:13 pm

    This sensory bottle is one of my favorites. Cant wait to make one this weekend.

    Reply
  3. Star D. says
    September 9, 2018 at 2:31 pm

    We made this last night (thanks to sales at Michael’s) but i haven’t glued it yet . Do you hot glue at the rim of the voss bottle or all around the top curves?

    Reply
    • Angela Thayer says
      September 9, 2018 at 7:53 pm

      I hot glue the rim of the bottle and it works well!

      Reply

Leave a Reply Cancel reply

Your email address will not be published. Required fields are marked *

CommentLuv badgeShow more posts
about teaching mama
sensory play crafts printables fall winter spring summer

Search Teaching Mama

Archives

Copyright © 2021 Teaching Mama · Privacy Policy · Disclosure

1018shares
  • 2
We use cookies to ensure that we give you the best experience on our website. If you continue to use this site we will assume that you are happy with it.OkRead more