Germination Activity – Grow Seeds in a Jar!
Engaging children in hands-on activities is a powerful way to teach scientific concepts. This simple germination experiment allows children to observe the process of seeds sprouting and growing, which gives children a deeper understanding of plant biology.
Why Teach Seed Germination?
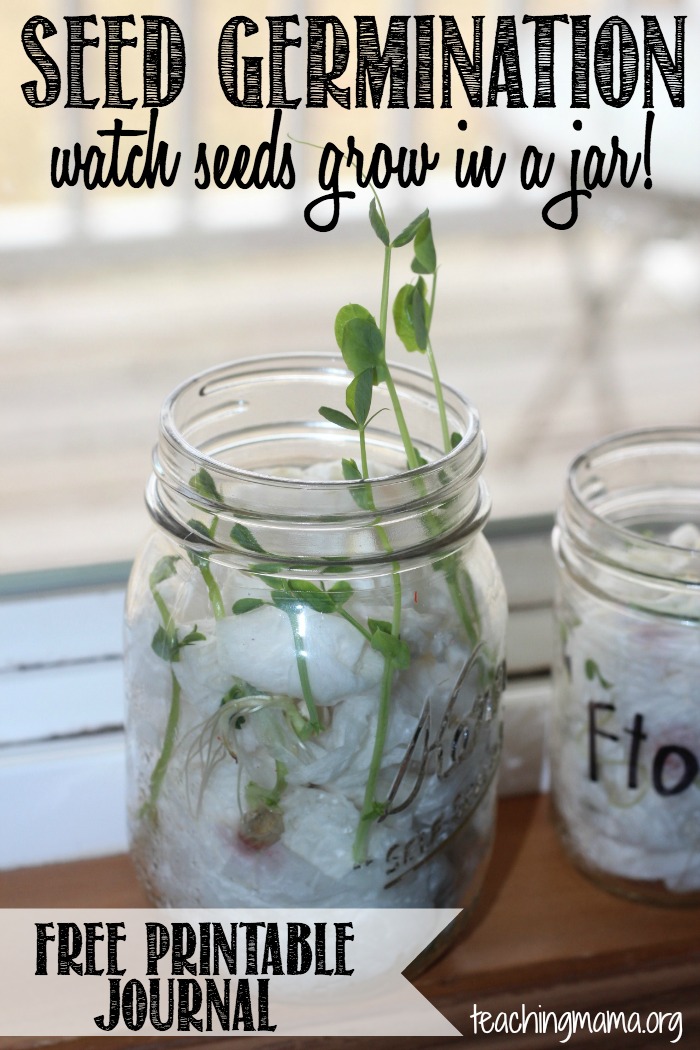
Germination is the process by which a seed begins to grow into a new plant. It’s an essential part of the plant life cycle, and this activity makes it easy for young learners to explore the early stages of plant development. By using a transparent jar, children can clearly see the roots, stem, and leaves emerge as the plant grows.
Materials Needed
Here’s what you need for this simple activity:
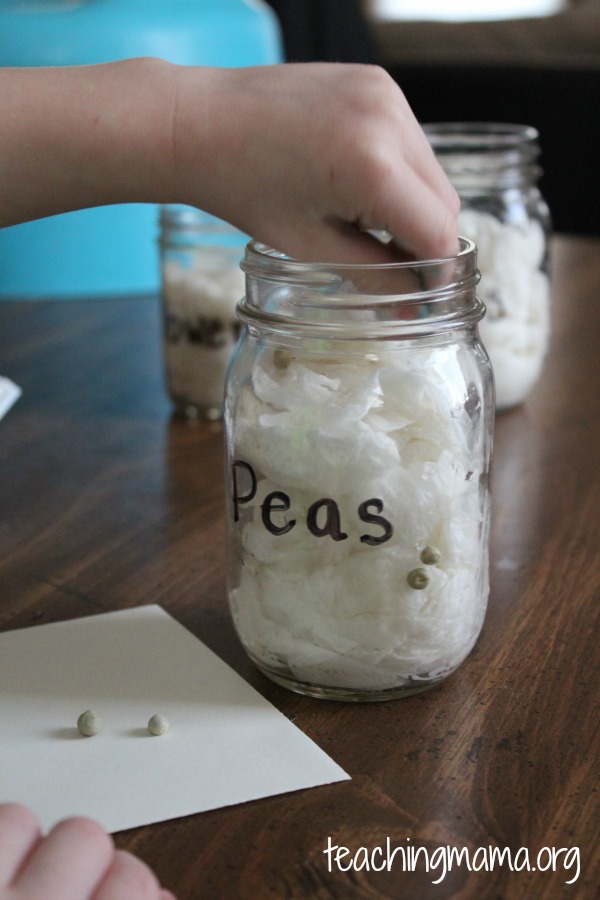
- Clear glass jars (one for each type of seed)
- Paper towels
- Water
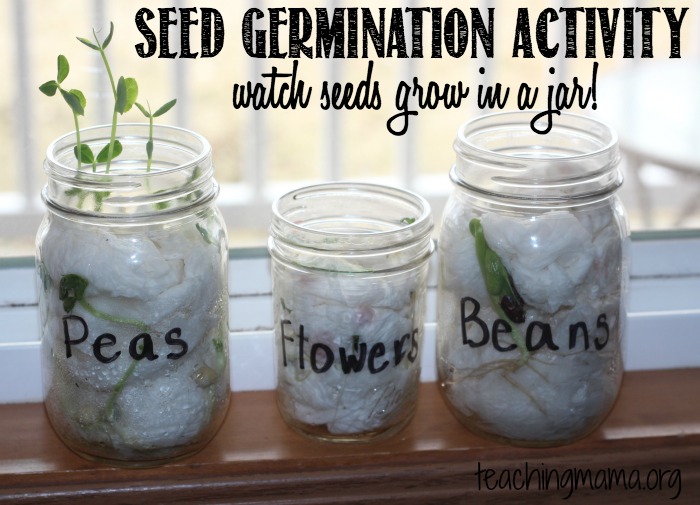
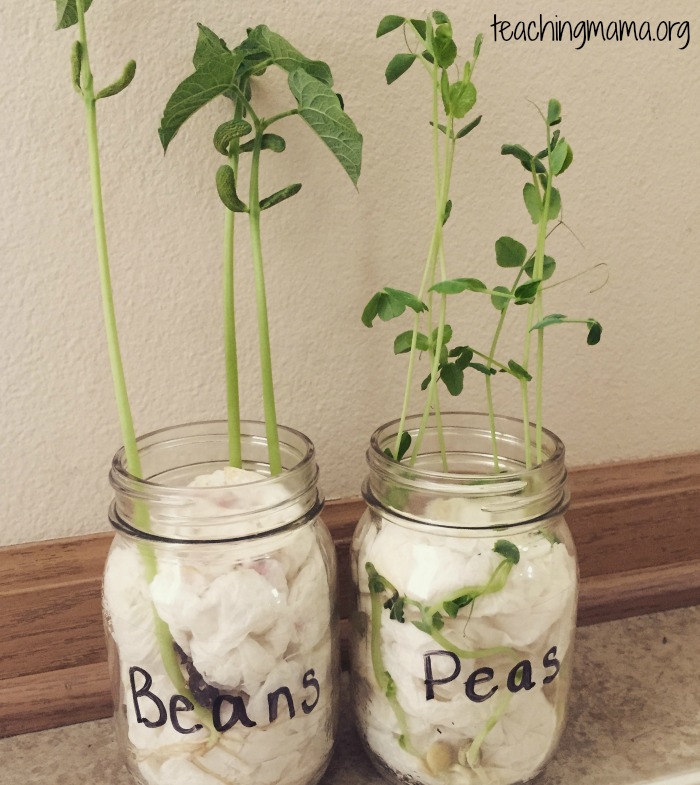
- A variety of seeds (e.g., beans, peas, flower seeds)
- Labels or masking tape
- Marker
Activity Directions
1. Prepare the Jar:
Fold a few paper towels and place them inside the jar so that they fit snugly against the glass. Dampen the paper towels with water, making sure they are moist but not soaked.
2. Insert the Seeds:
Carefully place seeds between the glass and the paper towel. Position them about halfway up so they are visible from the outside.
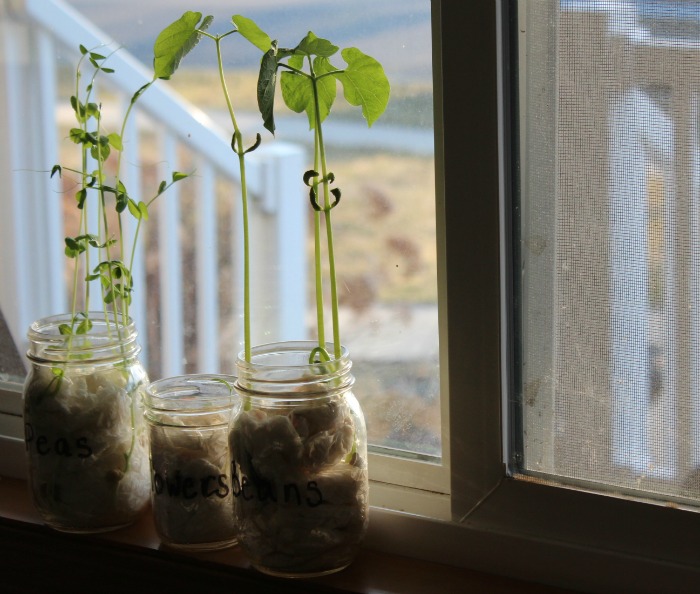
3. Find the Perfect Spot:
Place the jar in a warm, well-lit area such as a windowsill. Seeds need light and warmth to begin sprouting.
4. Observe and Maintain:
Check the moisture level daily and add water as needed to keep the paper towel damp. Avoid overwatering, as this can cause mold or rot.
5. Watch Growth Happen!
Over the next several days, observe the changes in the seeds. You’ll first see tiny roots emerging, followed by shoots and leaves as the plant grows.
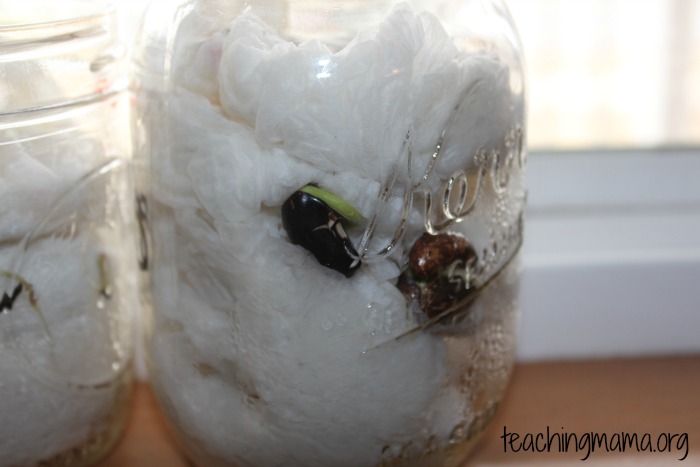
After about a week, they will really start to grow!
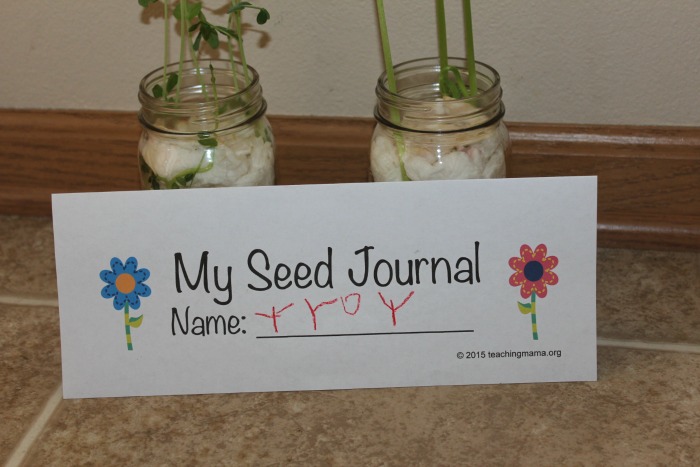
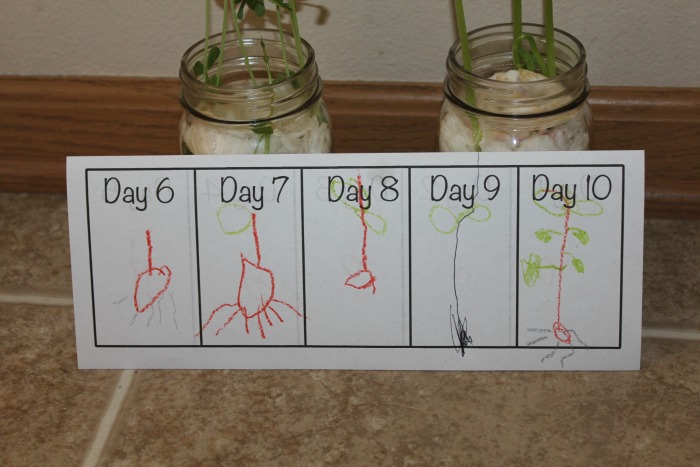
Journal Idea
We tracked the growth of the seed with a journal. The journal has 10 days to draw a picture of the seed growing.
Around day 16, our seeds looked like this!
It was so fun watching the seeds grow in our window.
Free Printable
I hope you’ll try this science activity out. To download the printable journal, click here —> My Seed Journal
To put the journal together, simply print the first page. Then flip over the page and print the second page on the back. Then fold the page horizontally.
Helpful Tips for Success:
- Choose fast-germinating seeds like beans or peas to keep children engaged.
- Make sure the paper towel stays moist—seeds will not sprout if they dry out.
- Use a clear jar for the best viewing experience.
This simple yet fascinating experiment allows children to witness the growth process firsthand, sparking curiosity about plant life and science. Whether at home or in the classroom, this germination activity is a fun and educational way to introduce kids to the plant cycle!
Try it out and watch those tiny seeds grow into thriving plants!

If you soak lima beans over night in a cup of water they will triple in size. Then carefully peel off the outer skin and very carefully split the seed. Get your magnifying glass and you will see the tiny first leaves inside and the first root! Exciting for kids to explore
do you use fresh seeds or dried
I used dried seeds.
Thank you for sharing!
Like the activity……. children will enjoy it ,
Hey! I love this…just wondering exactly what type of seed you used?
I used peas, flowers, and beans. I don’t remember which brand, but I think it was from The Dollar Tree.
really good..:)
Hi,
Many thanks for sharing your germination activity. I have been about ways in which my Y2 children could simply and regularly record the changes in their seeds over a couple of weeks and your seed journal is just perfect for them to do this independently.
You have saved me time!
Thanks.
Do I need to add water to paper towels regularly?
No need to add any water 🙂
What type of water did you use?
Just regular tap water.
Hey! This may be a silly question… but how are they able to grow without nutrients from soil?
That’s a good question! The seeds are able to grow from the sunlight and water, but they only lasted for about three weeks before they started to wither and die. I believe it’s because they weren’t in soil that they died. I’m not a scientist, but that’s just my guess 🙂 This activity is a way to show kids how seeds begin to grow. I’m guessing you could transfer the seeds to soil after they’ve started in the jar. Hope that helps!
Seeds contain nutrients (stored food) for the germination process, but need soil to continue to grow after it uses up the stored “food”.
What a wonderful idea! I will be doing this with my kids this week!
Thank you! I just printed out the journal for my kids.
They are so excited to get started.